Write It Do It
2027 season
On this page(12 sections)
Write It Do It is a communication event. One partner looks at an object and writes a description of it and how to build it. The other partner, who never sees the object, reads only that writing and tries to construct a copy in a fixed amount of time. The object can be abstract, and the builder gets nothing except what the writer put on the page. A team wins when its builder's model sits closest to the original, and the model is only as accurate as the words that produced it. The description must also contain no drawings.
The event tests writing a specification, not building skill. Engineers, lab technicians and assembly crews all depend on written instructions that a stranger can follow the first time without asking a question. This event is a timed version of that problem. Preparing for it therefore means practicing the habits that make a description precise: one fixed reference frame, named parts used consistently, counted and measured quantities, stated orientations, and an order of construction that never makes the builder guess. Memorizing object types or materials will not help much, because supervisors try to use different materials each year.
Event format
| Rule | Detail |
|---|---|
| Team | Two students. One writes the description; the other builds from it. |
| Total time | About 50 minutes for the event (approximate, per the 2027 rules) |
| Writer's time | 25 minutes to view the object and write the description |
| Builder's time | 20 minutes to build the copy from the written description |
| Allowed | The writer must bring a writing utensil. No other materials or resources are allowed. |
| The object | The same object for every team. It may be abstract, and it is built from materials including, but not limited to, science materials, inexpensive materials or commercial construction sets. |
| Handling | The writer may not touch the object unless the Event Supervisor permits it. |
| Output | A written description with no drawings or diagrams, plus the builder's reconstruction. |
| Scoring | Points for size, color, location, orientation and connection of each piece. Construction time is the tiebreaker. |
| Penalties | A drawn subsection of the model puts the team in Tier 2. A drawing of the whole model is a disqualification. |
The two timed phases add up to 45 minutes. The remaining few minutes of the approximate 50 cover the handoff of the description and transitions between phases. That arithmetic is an inference from the rules' approximate total, not a stated schedule, so check the event timeline with your coach or supervisor.
The writer must bring a writing utensil, and nothing else is allowed. You cannot bring a template, a ruler, a stencil, a parts list, a reference sheet or a calculator. That single restriction changes the preparation: everything you need to write well has to live in your habits, because you cannot consult anything during the event. The 2027 rules do not say what paper or writing surface the supervisor provides. Ask the supervisor ahead of time so you know what you will be writing on, and whether lines, margins or a set number of sheets are supplied.
The builder works from the written description alone, and the reconstructed model is what is compared with the original. Both partners therefore need to practice both roles. The writer discovers ambiguity by reading a text that someone else has to build from; the builder discovers ambiguity by reaching a step where the text does not say what to do.
What the rules cover
The 2027 Division B rules for this event fit on one page, and nearly all of them bear on how you write. The table below paraphrases each rule item and says what it means for preparation. Rule numbers refer to the 2027 rules manual. Nothing is impounded and no device is built in advance: the object is shown at the event, and the only thing a team brings is the writer's writing utensil.
| Rule | What it requires, in plain words | What it means for you |
|---|---|---|
| 1. Description | One partner describes an object and how to build it; the other partner builds it from that description. | Your writing is the whole deliverable. Nothing else you do counts. |
| 2. Parameters | The writer brings a writing utensil. No other materials or resources are allowed. | Practice with a blank page and no notes. Your reference frame, parts key and checklist must become habits. |
| 3a. Object | One participant per team views the object, which may be abstract. The same object is used for all teams. The viewer may not touch it unless the supervisor allows. | Study the object by looking, not handling. Expect shapes you have never built before. |
| 3b. Writing time | The viewer has 25 minutes. Finishing early earns nothing. | Use the whole time. A complete description is worth more than an early one. |
| 3c. Writing rules | No drawings or diagrams of the model or any subsection. Numerals, words and single letters that fit the written description are allowed. Abbreviations need no definitions. Editing, punctuation and scientific symbols are allowed when they fit the description. | Labels, coordinates, counts and a parts key are all legal, and you may cross out and correct text as you check. Sketches, arrow diagrams and grids drawn in the margin are not. |
| 3d. Handoff | The supervisor passes the description to the second team member, who has 20 minutes to build. | The builder reads one text, once, under time pressure. Write for that reader. |
| 3e. Materials | Supervisors try to use different materials than last year's event. | Do not memorize material-specific phrases. Define your own generic units and part types in the key. |
| 4a. Winner | The team whose build is nearest the original, with a description that has no drawings or diagrams, wins. | Accuracy of the build is the goal, but any drawing is penalized: a drawn subsection drops you to Tier 2, and a drawing of the whole model disqualifies you. |
| 4b. Point criteria | Each piece earns points for proper size, color, location, orientation and connection. | Every piece should be specified on each criterion that applies to it (size, color, location, orientation, connection). Points are awarded "as applicable," so don't stop at size and color. |
| 4c. Partial credit | Correctly connected pieces still count beyond an incorrect connection. Parts that are not used carry no penalty. | A single wrong connection does not void the rest of the model. Keep each piece self-contained. |
| 4d. Drawing penalties | Drawing a subsection of the model places the team in Tier 2. Drawing a picture of the whole model is disqualifying. | Treat any drawn sketch as a serious risk, even a small one. |
| 4e. Tiebreaker | Construction time is the tiebreaker. | Efficient, correct placement matters, not just finishing. |
Strategy
Splitting the roles
The rules fix who does what: the writer sees the object and the builder sees only the text. Because the same two students usually practice both roles, a practical split is to let the stronger spatial thinker lead the writing and let the more methodical partner act as the first reader. The first reader is important. A partner who reads the draft cold and says "I cannot tell where that piece goes" has found a gap that the writer, who already knows the answer, will read straight past.
Both partners should agree on the notation before the event. The writer uses the same key, frame and unit words from the first line to the last. The builder should be able to recognize every term the writer uses without needing to ask. Nothing in the rules stops you from agreeing on these conventions in advance, and it is the most valuable preparation you can do, because you cannot consult anything on the day.
Time budget for the writer
Twenty-five minutes is enough for a careful description of a moderate model if you follow a rhythm. One reasonable plan is to spend the first three or four minutes on the frame and an inventory: count the parts, name them and note the symmetry. Spend the next fifteen minutes or so writing steps in build order. Save the last five to seven minutes to check every count, every orientation and every connection against the object. The checking phase is where most points are protected, because it is the only point where an error is still fixable.
Do not spend the early minutes drawing or sketching a plan of the model. The rules forbid drawings, and even a rough sketch you intend to throw away can slip into the description. Use text, numbers and letters for everything.
Time budget for the builder
The builder has 20 minutes and should not start pulling pieces off the table in the first moments. Read the whole description once, find the frame and the parts key, and lay out the parts by name. Then build the base first, because every later placement is measured from it. Keep a short mental list of the steps that rely on counting, since those are the places where a miscount compounds. Because construction time is the tiebreaker, the builder should avoid rebuilding a whole module when a single piece is off; check the piece against the text, correct it and move on.
Working with a shortened timeline
Some teams find their description runs long in practice. Long is not the same as complete, and the steps that matter most are the first few that set the frame and the base, followed by any step that relies on counting. If you run out of time, make sure every piece at least has its name, its location and its connection written down. Size, color and orientation can be stated briefly, but a piece with no location gets no points for location at all.
Core concepts
The builder has only your words
The builder cannot ask a question. Every unstated assumption becomes a guess, and the guesses multiply. The chain usually runs like this: the description never says where the origin is, so the builder picks a corner; every offset in the description is then measured from the wrong corner; each later piece lands in the wrong place; and the score falls on location and connection criteria for each affected piece at the same time. One sentence that fails to define a starting point can cost the whole model.
The rule of thumb is to write each step as if the reader has never seen the object and cannot see the step before it. If a step says "attach it to the other end," the reader must know which end of which piece is meant. If a step says "one more," the reader must know one more of what, counted from where. Good descriptions remove these choices before the builder reaches them.
Fix one reference frame and never change it
A reference frame is the set of directions and a starting point that every measurement uses. Choose one origin corner on the base or the largest stable part, state which part it belongs to, and then name three directions. A common convention, and the one used in this guide, is +x to the right, +y away from you and +z up, all relative to the base as it sits on the table. Those three directions form a right-handed system, which matters for the sign of rotations (see below).

Write the frame once at the top, and then refer to it as "the frame" or by the axis names. Do not switch to "the front" or "the left side" midway through, because those words depend on where the reader is standing. Front, back, left and right are fine as long as the frame defines them. Undefined directions are the most common source of mirrored builds.
The three-axis frame is the same idea used in analytic geometry and in engineering drawings, where a datum is a reference feature that all dimensions are measured from. The engineering standard for dimensioning and tolerancing, ASME Y14.5, is built on that idea. A datum that is not clearly defined makes every dimension that depends on it ambiguous, which is exactly the failure this event punishes.
Name every part once and use only that name
Each part needs a name that the builder can match to the parts on the table. A useful pattern is a short code made of a letter and a number, with a key at the top that gives the type, size and color, such as B0 for a base plate, R1 for a rod or K1 for a block. The code is the handle. After you define it, do not switch to "the blue one," "the long piece" or "that rod" unless the description still means exactly one part. Color words are especially risky, because two parts may share a color and the color is not unique.
The key should list each part once, with its dimensions in your units and its color. Keep it short. The builder reads the key first, and a key that is hard to scan makes the rest of the text harder to follow. If two parts look nearly identical, say so in the key: "R1 and R2 are both red rods, but R1 is six units long and R2 is four units long."
Naming also helps you count. If you have parts named P1 through P7, you can say "P1 through P4" and be certain that the builder knows exactly which parts are included. A count like "the four small blocks" is a claim the builder has to verify, and it is an easy point of failure if one of the four is different from the others.
Measure in units you define
Every length and position needs a unit. A unit should be something the builder can find on the object: the spacing between two adjacent attachment points, the diameter of a rod, or the length of a standard part. State the unit once in the key. After that, write lengths and offsets in whole units wherever possible. "A little to the left" is useless, while "one unit in the −x direction" is a specification. If you need a fraction, write it as a fraction of a unit and be sure the builder has a way to find the half-way point.
Position is best written as the set of units a part occupies along each axis. Consider a rod that begins at x = 1 and ends at x = 7 along the length of a base plate that runs from x = 0 to x = 8. Its far end is at x = 7, and the distance from that end to the far edge of the plate is a simple subtraction. The same reasoning appears in any question that asks how much room is left.
Units also protect you against a common error: writing a count as if it were a length. A plate eight holes long is eight units long only if the hole spacing is the unit. If you call the holes "studs" in one line and "holes" in the next, the builder will reasonably wonder whether they are two different things. Pick one term, define it, and keep it.
Orientation: say which face points where
Orientation is the most frequently lost criterion because writers assume the builder will see what they see. Every oriented part needs three facts: which face points up or forward, which edge runs along which axis, and whether the part is symmetric. A square block is the same from both ends, so its orientation is determined only by its top and front faces. A long, asymmetric bracket needs its orientation stated in full.
Rotation requires a sign. Under the right-hand rule, a positive rotation about +z turns the x-axis toward the y-axis. Viewed from above, with +z pointing toward you, a positive 90° rotation is counterclockwise. If you write "rotate 90° clockwise," the builder must guess whether you were looking from above or below, so write the sign and the axis together.

Mapping a point with a 90° rotation about +z gives (x, y, z) → (−y, x, z). A 90° rotation is the only kind this guide uses for worked examples, because it keeps the arithmetic exact.
A mirror across a plane needs the plane's position, not just its name. Reflecting across the x = 4 plane, which runs through the middle of an 8-unit plate, maps x to 8 − x. A part that starts at x = 1 and ends at x = 7 maps to a part that starts at x = 1 and ends at x = 7 again, so it is symmetric about that plane. A part from x = 7 to x = 8 maps to a part from x = 0 to x = 1. A writer who says "mirror it across the centerline" has to say which line that is.
The rotation and reflection examples show why orientation text should be explicit. Each sentence can be checked with arithmetic, and a builder who wants to confirm an instruction can do the arithmetic on the spot.
Connections name both ends
A connection is a join between two parts. Each connection needs three names: the part being attached, the part it attaches to, and the attachment point on each. "Attach K1 on top of R1" describes the join. "Attach K1 to R1 with its bottom face on the top face of R1, over the two units from x = 3 to x = 5" is a complete connection that a builder can verify without guessing.
Because scoring is per piece and a correctly connected piece still counts even if an earlier connection was wrong, make each piece's connection self-contained. Do not rely on a later sentence to fix the position of an earlier part. If the builder places a part in the wrong spot, a well-written later step should still let the builder place the next part correctly relative to the frame, not relative to the mistake. Write each connection from the frame and the named parts, not from "the part we just attached."
Build order: stable base first
The order of steps is part of the specification. Describe the base first, then the largest stable parts, then the smaller parts that depend on them. A builder who has to hold a half-built structure in the air to add a piece will drop it, and every drop costs time. Order also matters because each placement is measured from something that already exists. If the description places a block on a rod before the rod is defined, the builder has to jump ahead and the text becomes harder to read.
A useful test is to ask whether every step can be performed with only the parts already placed and the frame. If a step needs a part that has not been introduced, move the introduction earlier or split the step.
Modules and subassemblies
Large objects are easier to describe as modules. Give a module a name, describe its internal layout in its own local frame, and then give one step that attaches the module to the main frame. A local frame should name its origin on a part of the module and state its axes relative to the main frame, for example "the module frame has its origin at the bottom-left corner of M1, with +x the same as the main frame." Modules reduce the number of measurements the builder must hold at once, but they only work if the module's frame is tied back to the main frame by an explicit statement.
Repeated parts or repeated modules can be described once, provided the repetition is explicit. "Repeat M1 at x = 0 and x = 6" is clear. "Repeat M1 on the other side" is not, because the other side may be a mirror image or a translated copy.
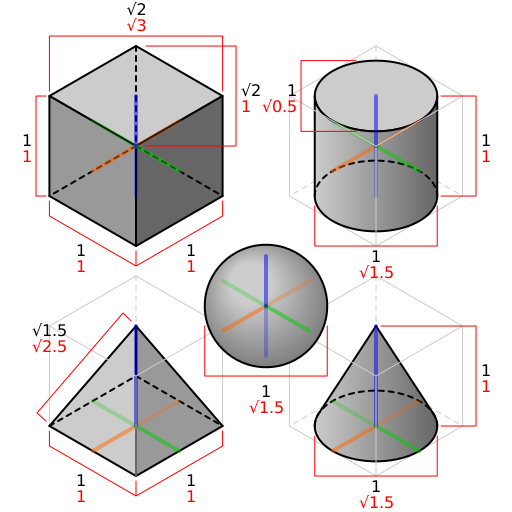
Drawings are forbidden, but thinking in simple solids is not. The figure below shows four common solids in isometric projection. It is included for the spatial vocabulary, not as a model for your description: you may not draw these, and you should describe whatever object you see as a set of simpler parts placed in your frame.
Describing the materials the rules name
The 2027 rules list the kinds of parts the object may be built from: science materials, inexpensive items such as straws, push pins, Styrofoam balls, paper cups and Popsicle sticks, and commercial sets such as K'NEX, Tinker Toys, Lego and Lincoln Logs. The list is open-ended and the supervisor tries to change materials each year, so learn the habits each family of parts demands and not a vocabulary for any one set.
| Kind of part | What to record in the key | Where descriptions usually fail |
|---|---|---|
| Studded bricks and plates (Lego-type) | Footprint as studs by studs, height in bricks or plates, color | Height. A standard brick is as tall as three plates, so "two layers" is ambiguous unless you say brick or plate. Which stud counts as the first one |
| Rods, sticks and straws | Length in your unit, thickness, color, and which end is which if the ends differ | Rods of different lengths that share a color, and a rod's far end versus its near end |
| Connectors and joints (K'NEX-type, Tinker Toy spools, push pins) | How many rods meet at the joint, which slots or holes they use, and the angle between rods | Saying "connect" without naming the slot or hole. Counting slots from an unstated starting slot |
| Notched or stacked parts (Lincoln Logs-type, cups) | Which way the notch or opening faces, and the layer number counted from the base | Layer counts that start from different places, and openings that point the wrong way |
| Spheres and loose items (Styrofoam balls, beads) | Diameter relative to your unit, color, and the exact point where each other part meets it | Contact points. A ball has no edges, so say where on its surface a rod enters, in frame directions |
Whatever the material, pick the smallest repeating dimension you can count (a stud, a hole, a slot, a rod diameter) as your unit, define it in the key, and count in it.
A worked model from start to finish
The steps below show how the habits above combine. The example is a small generic model made of four parts. It is not a real tournament object, and it is written at the level of detail a good description needs. Read the description once as a builder would, then reread it with the model in mind.

Several things in the sample are worth noticing. The frame names a part the builder can find and defines all three directions. The key gives each part its units, its color and its size, so the builder can identify each piece before any step is read. Each step uses ranges of units instead of descriptive words such as "near," "middle" or "end," and each connection is stated from the frame, not from the previous step.
The steps also show how to check your work. R1 ends at x = 7, which leaves one unit before the far edge of B0 at x = 8; that is the gap formula above. P1 sits in the corner from x = 7 to x = 8, so it does not touch R1, which occupies y = 2 to y = 3 while P1 occupies y = 0 to y = 1. A writer who wanted to be certain would say so explicitly in a closing sentence: "P1 and R1 do not touch." That kind of sentence saves a builder from guessing whether a gap is intended.
Notice also what the description leaves out. It has no drawing, no arrow and no grid. Coordinates, letters and numbers carry everything, and those are allowed under rule 3c.
Checking a description before you hand it over
A simple final check can be run in the last few minutes of the writing phase. Read each step and ask four questions. Is the part named with a key code? Are its size, color and location stated in units from the frame? Is its orientation stated in terms of faces and axes? Is its connection written with both parts and the attachment point? A step that fails any of these questions is a candidate for the next round of edits.
Then check the arithmetic. Add up the counts of each part type and compare them to the key. Confirm that any range such as "x = 3 to x = 5" has the right length (two units). Confirm that every sign is written. If you wrote "mirror across x = 4," check that a symmetric part's far end lands where you expect.
Scoring strategy
The rules list five criteria for each piece: size, color, location, orientation and connection. The 2027 rules list the criteria but do not publish a point value for each one, so this guide does not assign numbers. Ask the supervisor about any scoring detail that is not in the rules text. What the rules do make clear is how the scoring behaves.
Because each piece earns points on several criteria, a piece that is specified completely can score on every one of them, while a piece described only by its color scores on color alone. Prioritize the criteria that depend on the frame and the connection, since those are the criteria that make the whole model's position correct. A large base placed in the wrong location shifts every part on it, while a color mistake affects one part.
Partial connections count. The rule that keeps correctly connected pieces in the score even when an earlier connection is wrong means that a builder should keep building correctly after a mistake rather than tearing the model down. A writer who makes each connection self-contained also protects the team against cascading errors. The builder who notices an early error should fix it only if the fix is quick, and should otherwise continue with the steps that are still correct.
Drawing is a scoring hazard, not just a rule. Under rule 4d a subsection drawing drops the team into Tier 2, and a drawing of the whole model disqualifies the team. That penalty can outweigh every point the model earns. Keep all visual information in words, numbers and letters, and treat any pictorial idea as something to describe in units instead.
The construction time tiebreaker rewards careful, efficient building. The builder should aim for correct placements on the first attempt, since rebuilding a module is the slowest way to recover from an error. Most of the speed comes from a description that is easy to follow, which is why precise writing is also the fastest path to the builder's best time.
Common pitfalls
How tournaments test this
Write It Do It has no written test, so there are no archived question sets to study and no recurring answer keys. What can be described is how the event is run, which the 2027 rules lay out directly.
The test is a performance task, not a question set. It is scored on the reconstruction and on the written description together. Scorers compare the builder's model with the original object, piece by piece, against the five point criteria. The description is also checked for drawings, which is why the drawing rules carry penalties that can outweigh the model's points.
Because the object changes from year to year and the materials change with it (rule 3e), the test is unpredictable at the level of content. What stays constant is the skill. Expect an object that may be abstract, that is built from parts you have not seen in practice, and whose pieces must each be described on size, color, location, orientation and connection. A team that has practiced writing for generic parts, using units and a key, can handle a new object more easily than a team that memorized one object's vocabulary.
The time limits also shape the test. The writer's 25 minutes and the builder's 20 minutes mean the description has to be complete before the writer runs out of time. Practice sessions should therefore use the real limits, and should end with the writer checking the description against the object, because that check is the part students most often skip under pressure.
Practice plan and testing log
The most effective practice for this event is a blind build. One partner writes a description of an object while the other partner watches from a position where the object is hidden. Then the builder constructs from the text alone, and the two compare the result. Each mismatch is evidence of an ambiguity. Record the mismatch, decide which word or number removed the reader's choice, and add that convention to the key for the next session.
A testing log makes the pattern visible over time. Keep one line for each practice round. The useful columns are the date, the object (described by a short note rather than a drawing), the writer's time used, the builder's time used, and the count of pieces that matched on each of the five criteria. Add one column for the error types that appeared, using the criteria names as categories, and one for the fix you added to the key. Over several sessions the most common error type will tell you what to practice next. If location errors dominate, practice frames and unit counts. If connection errors dominate, practice naming both ends of each join.
Practice with several kinds of object. Use one with clear right angles, one with a symmetric center, one with a repeated module, and one that has parts that look almost identical. Each kind of object stresses a different habit. The symmetric object tests whether you state the mirror plane. The repeated module tests whether you define the module frame. The near-identical parts test your key.
Practice both roles. A writer who has built from another partner's text learns quickly which phrases cost time. A builder who has written a description learns which steps are easy to misread. Both perspectives sharpen the writing.
Test yourself
Because the event has no written test, the practice below uses original tasks instead of quiz questions. Each task has an answer. Work each one before reading the answer, and aim to be able to explain the answer in one sentence. The arithmetic in each answer can be checked by hand.
Resources
- The Write It Do It event page on soinc.org posts rule clarifications and any updates to the 2027 rules.
- The Science Olympiad store at store.soinc.org sells general coaching materials.
- The SciOly Wiki page for the event, linked below, collects community notes. Use it as a starting point, and check its claims against the 2027 rules.
References and further reading
- Science Olympiad, 2027 Division B rules manual, Write It Do It (page B61), available from soinc.org. The event rules summarized in this guide.
- SciOly Wiki, Write It Do It: scioly.org/wiki/index.php/Write_It,_Do_It. Community notes on the event.
- Cartesian coordinate system, as a background on axes and origins: en.wikipedia.org/wiki/Cartesian_coordinate_system.
- Right-hand rule, for the sign convention used in rotations: en.wikipedia.org/wiki/Right-hand_rule.
- Rotation matrix, for the quarter-turn mapping used in the examples: en.wikipedia.org/wiki/Rotation_matrix.
- ASME Y14.5, Dimensioning and Tolerancing, the engineering standard on datums and reference frames. Available from the American Society of Mechanical Engineers.
Official references
Sample notesheet
Download a printable, rule-compliant sample notesheet. Customize with your notes.